


Resin Techniques for Laser Cut Projects
Laser cutting has revolutionized the way makers, designers, and small businesses craft intricate shapes from wood, acrylic, and MDF. But even the most precise laser cuts can benefit from color, depth, or a sleek glossy surface—and that’s where resin comes in.

When combined with laser-cut elements, epoxy resin unlocks creative potential. It transforms plain wood signs into colorful artwork, enhances jewelry with shimmer, and gives flat objects dimension and durability. Resin’s smooth finish and custom color effects make it a top-tier addition to laser projects.
This guide walks you through each step—from file design and laser cutting with an OMTech machine to resin mixing, pouring, and finishing. Whether you’re decorating a wall sign, filling engraved text, or crafting jewelry, this tutorial will help your project shine.
Why Use Resin in Laser Projects?
Laser-cut materials like wood, acrylic, and MDF offer detailed cuts and precision. But if you want to:
-
Add intense color
-
Achieve a shiny, glass-like finish
-
Fill engravings and cutouts
-
Protect delicate surfaces
-
Add branding accents or highlights
…resin is your go-to material. It sticks well to most laser-safe surfaces, can be tinted, poured in layers, or shaped into domes for raised effects.
What You’ll Need
Before you begin, prepare the following:
Tools & Materials:
-
OMTech laser engraver
-
Design file (SVG, AI, or DXF)
-
Base material (wood, MDF, colored or clear acrylic)
-
Two-part epoxy resin
-
Pigments or mica powders
-
Mixing cups and stir sticks
-
UV lamp (optional for UV resin)
-
Painter’s or masking tape
-
Nitrile gloves and protective gear
-
Heat gun or mini torch (for removing bubbles)
Step 1: Design and Laser Cut Your Base
Start by designing a piece that includes engraved or recessed sections for the resin. These can be logos, text, patterns, or geometric shapes.
Open your file in LightBurn or similar software and adjust your laser settings. When using an OMTech laser:
-
Use wood or MDF for deeper engravings
-
Use acrylic for layered or embedded effects
-
Apply tape to minimize burn marks and simplify cleanup
Cut or engrave your design. Ensure engraved sections are clean and deep enough to hold resin.
Step 2: Clean and Prepare the Surface
After engraving, peel off the masking tape and clean the surface.
-
Use compressed air or a brush to remove dust
-
Wipe with isopropyl alcohol to eliminate soot
-
Lightly sand wood engravings for better adhesion
To protect non-resin areas, re-mask the surface and cut away the sections to be filled. This controls overflow and keeps your piece tidy.
Step 3: Mix Your Resin
Mix your epoxy according to the package instructions—usually a 1:1 resin-to-hardener ratio.
-
Stir slowly for 2–3 minutes
-
Let the mixture rest to allow air bubbles to rise
Then, divide into smaller cups to mix in pigments, dyes, or mica. Mica powders add shimmer, while alcohol inks offer transparent color effects.
Tip: Wear gloves and work in a ventilated area—resin is sticky and can irritate the skin.
Step 4: Fill the Engraved Areas
Use a dropper, pipette, or spoon to carefully fill the recessed areas.
-
Pour a little at a time
-
Use a toothpick to guide resin into tight spots
-
Gently tap the board to let resin level out
If creating a domed effect, pour slowly and stop just before the resin spills over.
Step 5: Remove Air Bubbles
After pouring, use a heat gun or torch to pop bubbles. Hover the heat source above the resin without burning it.
Let it sit for 10–15 minutes and pass over it again to catch any remaining bubbles. For fine details, use a hair dryer on low or a heat pen.
Step 6: Allow to Cure
Let the resin cure fully—usually 12 to 24 hours, depending on the brand. Cover your piece while it cures to protect it from dust.
For small items like earrings or pendants, you can use UV resin, which cures in minutes under a UV lamp. Note that UV resin has a shorter shelf life and isn't ideal for thick layers.
Step 7: Final Touches
Once cured:
-
Peel off tape
-
Sand edges if needed
-
Optionally, apply a topcoat for extra shine and durability
Your resin-enhanced laser piece is ready to display, wear, or sell!
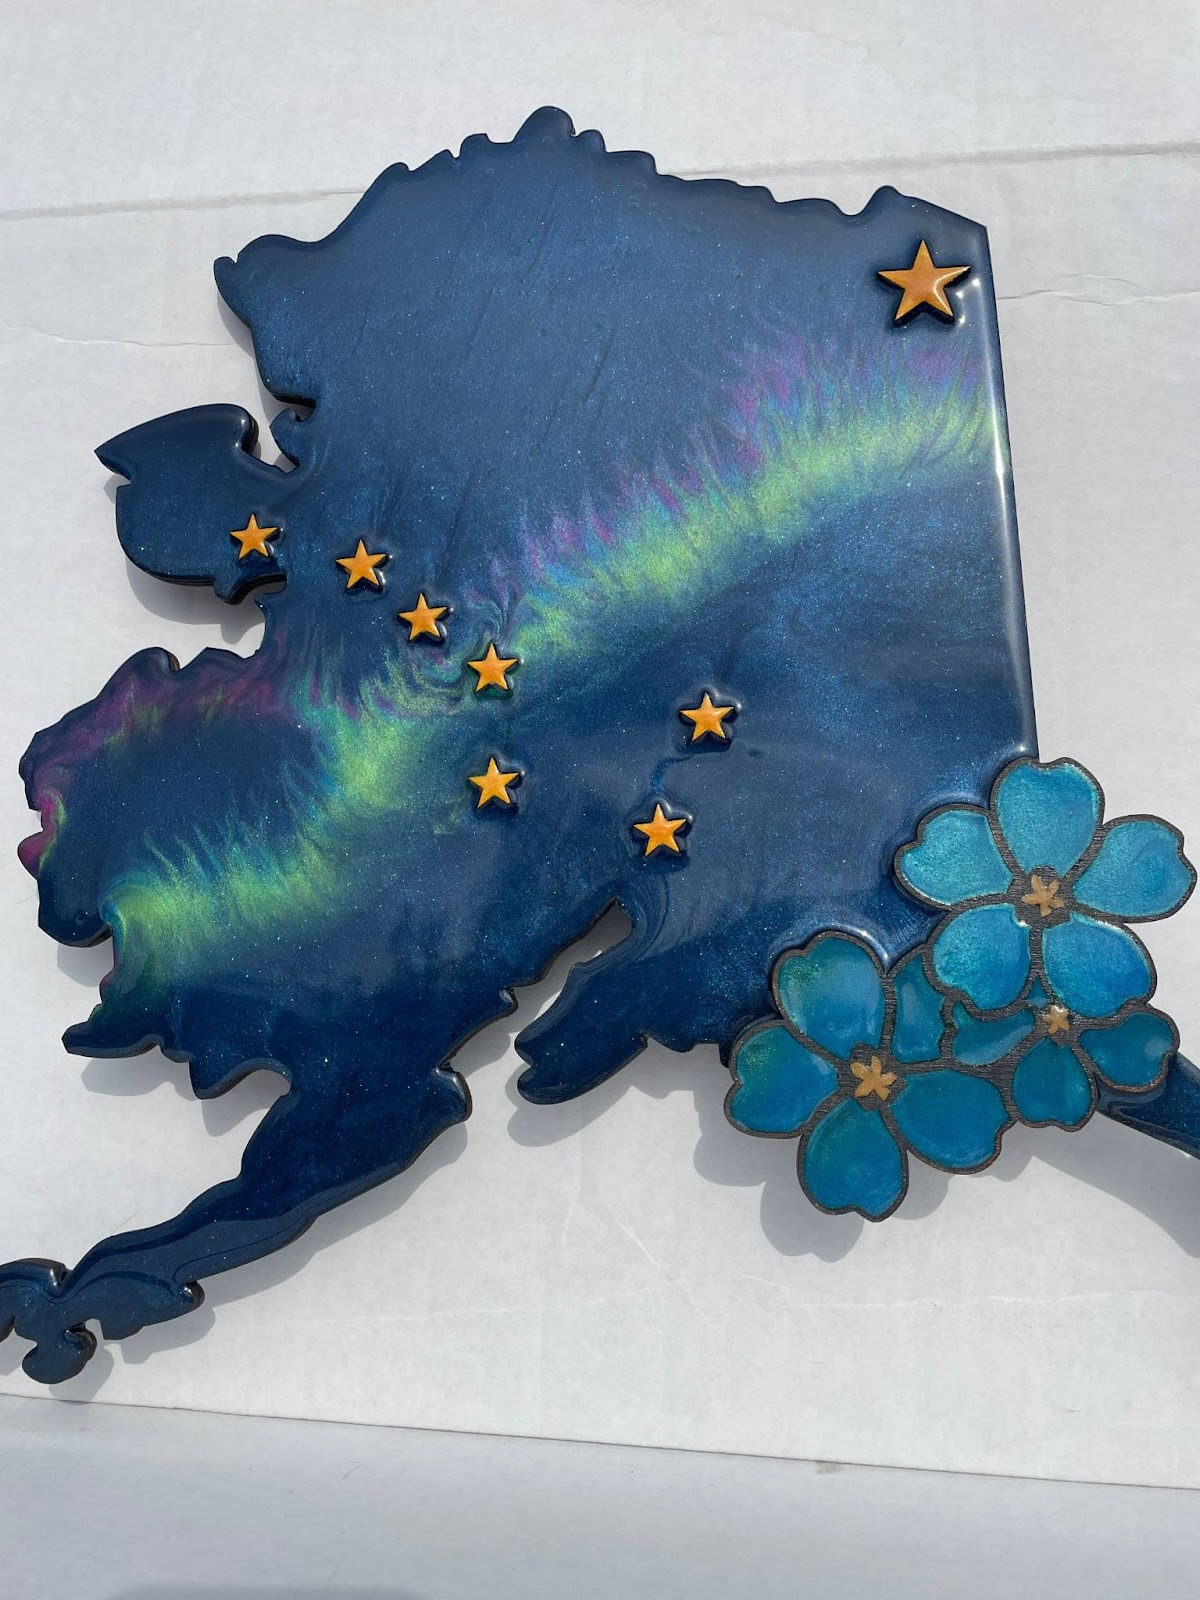
Popular Laser + Resin Projects
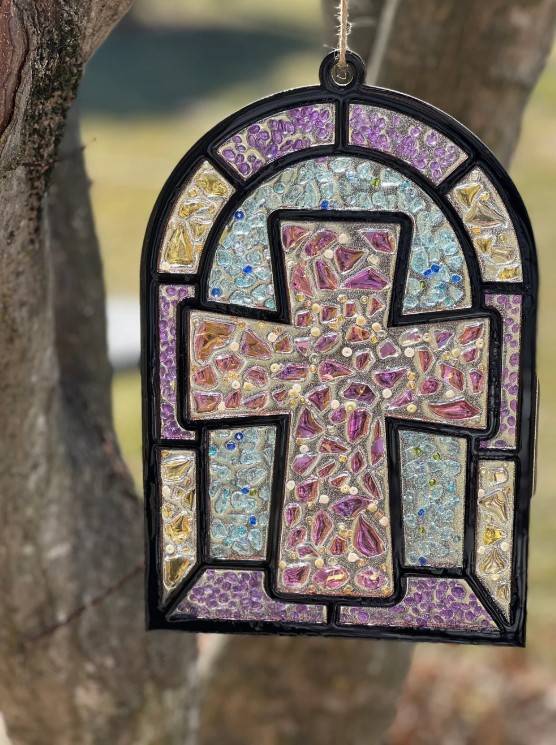
Laser engraving and resin are a match made for creative makers. Popular combinations include:
-
Custom name signs with colored inlays
-
Glitter-filled ornaments
-
Wood and acrylic jewelry with resin domes
-
Coasters with engraved logos
-
Layered maps with tinted water and land sections
Resin enhances the beauty and adds a premium feel to handmade laser-cut goods.
Pro Tips for Success
-
Test resin-pigment combos on scraps
-
Work on a level surface
-
Keep resin in a warm space (cold resin thickens or clouds)
-
Don’t overfill—resin is hard to sand
-
Clean tools right after use
OMTech Lasers: Ideal for Resin Work

Laser cutting is the backbone of many resin projects, and OMTech CO₂ machines are built for the job. From deep engraving to clean acrylic cuts, they deliver precision and reliability.
OMTech offers a wide range of desktop and mid-sized engravers perfect for wood, MDF, and cast acrylic—all ideal for resin inlays. Models like the OMTech Polar, MF-Series, and K40+ are trusted by DIYers, Etsy creators, and small businesses alike.
Plus, OMTech’s helpful user community and tutorials make learning new techniques like resin pouring and masking simple and accessible.
Conclusion: Add Color and Depth with Resin
Resin transforms laser-cut designs into polished, colorful, and professional-grade pieces. With the right machine, a little practice, and creative vision, you can turn your laser projects into art that stands out.
Ready to elevate your craft?
Check out OMTech’s lineup of CO₂ laser machines and start building resin-ready projects with precision and creativity.


