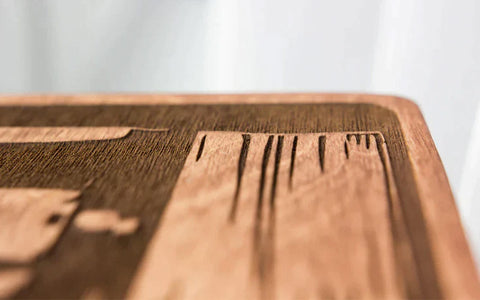
CO2 Laser Engraving on Wood: Step-by-Step Guide for Beginners
If you are a newcomer to the world of CO2 laser engraving on wood, don't worry. In this article, we will provide you with a detailed step-by-step guide on how to successfully work with a CO2 laser engraving machine on wood. From the basic settings to important tips for beginners.
Step 1: Preparation

Choose the right wood: Start with a soft wood like pine or balsa, as these are easier to engrave.
Surface preparation: Make sure the surface is clean and smooth. Remove any dust, dirt, or other impurities that could affect the engraving result.
Step 2: Software and Settings
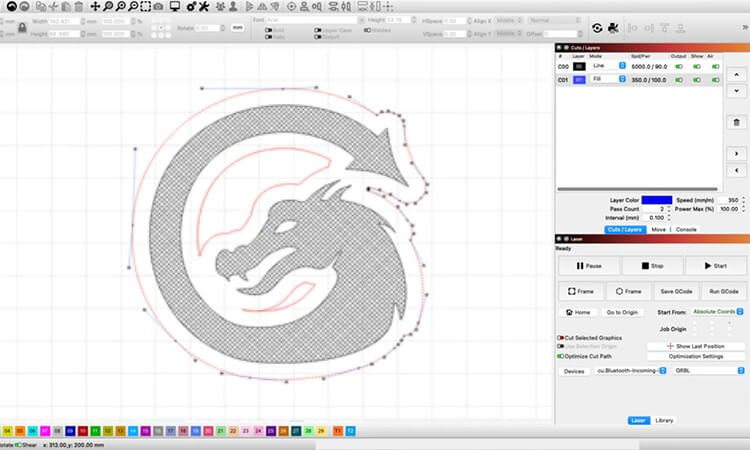
Choose suitable software: Use laser engraving software that is compatible with your CO2 laser engraving machine. The free software for OMTech CO2 lasers is RDWorks. Another widely used, one-time purchase software is "LightBurn," a powerful software with advanced features such as vectorization, image editing, and the creation of complex designs.
Import or create designs: Depending on the software, you can either import existing designs or create your own. If you already have a design, import it into the software. If not, you can use the software's design tools to create your own graphics or customize existing templates.
Power settings: Depending on the type of wood and the desired depth of engraving, you will need to adjust the power of the CO2 laser cutter. Start with a low power setting and gradually increase it to achieve the desired result.
Speed settings: The speed of the laser head also affects the engraving result. Experiment with different speed settings to find the optimal combination of power and speed.
Custom engraving settings: In addition to laser power and speed, the software usually allows you to adjust various engraving settings such as resolution and scanning mode. Experiment with these settings to achieve the desired engraving results. Please note that the optimal settings may vary depending on the type of wood and the desired depth of engraving.
Step 3: Positioning and Focusing
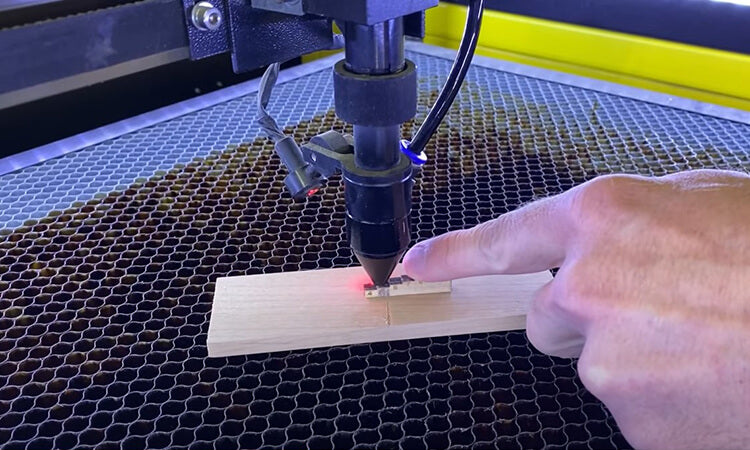
Place the wood piece correctly: Secure the piece of wood firmly on the work surface of the laser engraving machine. Ensure that it is positioned firmly and stably to avoid slipping during the engraving process.
Determine the optimal focus point: Proper focusing is crucial for achieving a clear and sharp engraving. Most CO2 laser cutters have a manual or automatic focusing feature. Follow the manufacturer's instructions to set the focus. You can watch this video that explains how to focus your CO2 laser for both manual and auto-focus devices.
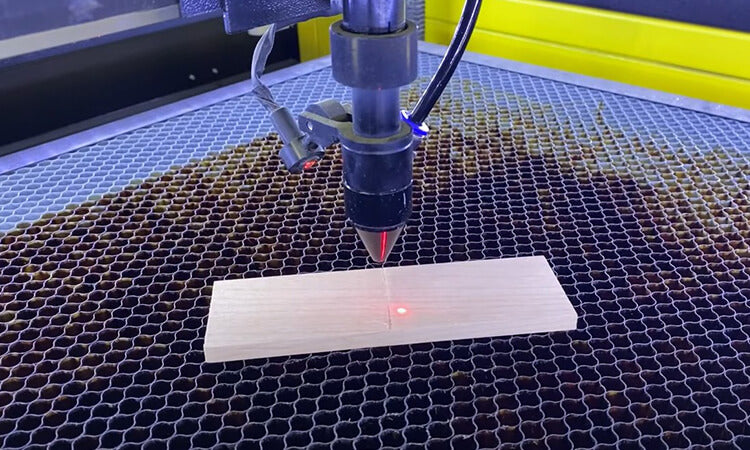
Test the focus: Perform a test run on a sample piece to ensure that the laser beam is properly focused. Check the engraving result and adjust the focus settings if necessary until you achieve the desired sharpness.
Consider the thickness of the material: Depending on the thickness of the wood, adjustments may need to be made to achieve the optimal focus. Ensure that the laser head is at the correct height above the surface of the wood to ensure an even engraving.
Check the positioning of the design: Make sure that the design or graphic you want to engrave is correctly positioned on the wood. OMTech's Polar allows the software to preview the function and adjust the exact engraving position and size through the camera.
Step 4: Test Engraving and Monitoring
Perform a test engraving: Before starting on the actual project, conduct a test engraving on a similar piece of wood to check the settings.
Monitor the engraving process: Stay close to the machine during the engraving to immediately detect and address any potential issues.
Preparation of the test piece: Use a piece of wood of the same type and thickness as the main piece for a test engraving. Ensure that the test piece is well-positioned and securely fastened to the work surface.
Check the engraving settings: Make sure that the engraving settings adjusted in the software are suitable for the test piece. Pay attention to the laser power, speed, and other relevant parameters.
Start the test engraving: Initiate the engraving process on the test piece according to the settings established in the software. Be careful to monitor the engraving process closely.
Observe the progress: While the laser engraving is underway, watch the progress closely. Look for whether the design appears clear and distinct on the wood and whether the desired engraving depth is achieved.
Check the quality of the test engraving: After completing the test engraving, carefully review the result. Examine the sharpness of the design, the depth of the engraving, and any irregularities or errors. This will help you make any necessary adjustments to the settings before you start engraving on the main piece.
Step 5: Start of Engraving
Double-check the settings: Ensure that all engraving settings in the software are correct and meet the requirements for the piece of wood. Make sure that the laser power, speed, and other parameters are appropriately set.
Position the wood piece: Carefully place the wood piece on the work surface of the CO2 laser engraving machine. Make sure it is securely fixed and cannot slip.
Start the engraving process: Begin the engraving process according to the settings established in the software.
Monitor the progress: While the laser engraving is in progress, carefully monitor the progress. Ensure that the design appears clear and distinct on the wood and that the desired engraving depth is achieved.
Step 6: Completion of the Engraving

Stop the engraving process: Once the engraving is complete, stop the engraving process in the software and turn off the laser engraving machine.
Inspect the result: Carefully inspect the engraved design. Check the sharpness of the lines, the accuracy of the pattern, and ensure that the piece of wood has not been damaged.
Remove residues: Remove any residues or ash from the engraved surface. Use appropriate cleaning agents or tools to ensure that the design is clearly visible.
Evaluate the quality of the engraving: Take the time to assess the quality of the engraving. Ensure that the design meets your expectations and that all details are clearly visible.
Post-treatment: Depending on your preferences and requirements, you may perform a post-treatment of the engraved wood piece. This can include the application of wood preservatives such as varnish or oil to protect the wood and emphasize the engraving design.
Safety and Precautionary Measures
Wear protective equipment: Always wear personal protective equipment, including safety glasses and, if necessary, gloves. This protects your eyes from laser beams and your hands from burns or injuries.
Well-ventilated area: Ensure that you are in a well-ventilated area with a properly connected exhaust system and that there are no flammable materials nearby. Laser engraving processes can generate smoke that may be harmful to health.
Fire hazard: Wood is flammable, so it is important to ensure that there are no flammable materials nearby. Keep fire extinguishers ready and extinguish any fires immediately.
Safety monitoring: During the entire engraving process, it is important to monitor safety. Make sure that the laser engraving machine is functioning properly. Pay attention to unusual noises or vibrations and ensure that the machine is operating correctly. Adhere to all the manufacturer's safety guidelines.
Keep children and pets away: Keep children and pets away from the laser engraving machine during operation. Laser systems can be dangerous and should not be left unattended.
Know the emergency stop switch: Make sure you know the location of the emergency stop switch and how it works. In an emergency, you can immediately turn off the machine to minimize potential hazards.
Use the correct material: Only use materials that are suitable for laser engraving. Check if the wood is free from coatings, varnishes, or other substances that could generate toxic fumes.
Turn off the machine before cleaning: Turn off the laser engraving machine before cleaning it or performing maintenance work. This prevents accidental injuries from the laser beam.
Training and guidance: Familiarize yourself with the operating instructions of the laser engraving machine and, if necessary, receive training for safe use of the machine. Knowledge about the operation and safety guidelines is crucial.
Conclusion
We hope that this comprehensive guide helps you to better understand the process of wood engraving with a CO2 laser engraving machine. Even beginners can successfully engrave on wood with a CO2 laser cutter. Remember to be patient and to carefully review your settings as well as safety precautions. Dive into the fascinating world of CO2 laser engraving and let your creativity run wild.
Related Articles