Photo Engraving: How to Laser Engrave Photos on Slate Stone
Laser engraved pictures are among the most sought-after novelty items on the gift market today. Picture engraving on unusual materials requires extra trial and error — all part of the learning curve and enjoyment of using a CO2 laser engraver. Laser engraving images on stone is a less common practice yet still greatly appreciated for its earthen elegance and stoic permanence.
While most laser users begin with engraving text or logos, photo engraving on stone is an advanced technique that any professional or DIY laser engraver should acquire. In this article, I will teach you how to prepare an image for laser engraving using Adobe Lightroom and LightBurn laser software, and how to laser engrave a photo on slate stone.
The Beauty of Laser Engraved Stone
Slate is a naturally formed rock (and therefore very eco-friendly) that was created over 500 million years ago from compressed clays and volcanic ash. It has been mined for centuries and used for roof coverings, floors, gravestones, and household trivets due to its excellent heat resistance. However, it is a soft stone and shears easily, so it needs to be handled carefully. It can also have very sharp edges, handle carefully!
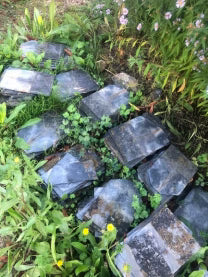
As it is a natural material, it will have imperfections, may not be uniform in colour (ranging from light to dark grey), and may have impurities within it. But those imperfections make it a wonderful substrate for photo engraving, where its natural beauty adds to the finished piece.
How Does Laser Photo Engraving Work?
Photo engraving refers to the process of engraving vivid images onto various materials. While other methods of picture engraving exist, you can use a laser engraver to engrave photos on wood, acrylic, glass, and othermaterialslike slate stone. Laser engraved photos are some of the most popular products in the laser engraving industry, but the process of image engraving adds more variables into play, making the process more complex. Many users learn how to laser engrave a photo onto a specific material and stick with that same material until they have mastered it. Don’t be intimidated by the extra steps involved with picture engraving — simply understand that it will require some trial and error, and be sure to practice with scrap materials first.
How to Prepare an Image for Laser Engraving?
Creating a beautiful 3D laser engraved photo is not all about the laser engraving process. There are a number of steps required to prepare an image for laser engraving so let’s step through them one by one.
How to Convert a Photo for Laser Engraving Images?
Step 1: Choosing your photo
An excellent laser engraved portrait can be hard to find. Not every photo will laser engrave well. Choose a photo that has plenty of detail and no large areas of a single color. Be careful where black or white parts might merge together and lose the definition between them. Developing your eye to find the best images for photo engraving is also a key part of the process.
Step 2: Convert to black & white
It should be obvious that laser photo engraving is a two-color process: it’s black or white (or greyscale shades in-between). Therefore we have to lose the color information and convert the photo to black and white.
When editing the photo on the computer, I prefer Adobe Lightroom, but there are many tools available, lots of them are also free, so the choice of which one to use is up to you, and all we need to do at this step is to load the photo and change it’s the mode to “Black & White.”
Step 3: Consider the material being engraved - dithering
After converting the image to black and white, the photo will have 256 shades of grey, producing the subtle variations used to create shadows and details.

Caption: This image is an excellent candidate to become a laser engraved portrait.
Now some materials, such as wood, are very good for laser engraving images (burned) at various power levels so that the laser can create light and dark shades by adjusting the power as it moves across the wood. However, some materials, such as slate in our case, do not always behave well for photo engraving. When the laser beam hits it, it cuts into, or ‘ablates’ the surface, it has either an engraved or non-engraved finish, not a variation in-between. To overcome this issue, we use ‘dithering.’ You will probably have seen this in newspapers. Look closely at the image on a newspaper, and you will see it is made up of tiny dots because newspaper printers only use black ink. They don’t have different shades of grey inks, so dithering creates the illusion of greys, dark, and shades.
For our slate photo engraving, we will use the same technique. Convert the photo into a dither pattern consisting of millions of tiny dots. Each dot will be just one color — that of engraved slate. An unengraved slate will give us the second color.

Step 4: Inversion
Now we have another issue. If we were to photo engrave a piece of wood, the wood would char and turn brown or black, so we would see the engraved image appearing as black dots — perfect! However, when the slate is hit with the laser beam and ablated, the result is a light grey, and the untouched areas remain dark grey. So our image comes out reversed. The solution is relatively simple: we ‘invert’ our image before engraving, so black becomes white and vice versa. Fortunately, LightBurn can handle both the dithering and the inverting for us. Clever stuff!
Step 5: Fine-tuning the photo
The photo is now almost ready for laser engraving, but a couple of techniques can be used to make it engrave even better. The idea is to reduce the contrast of darker areas, brighten the whites slightly (not to the point that they ‘burn’ out), and ensure that there are no large areas of black or white. Not every image lends itself to laser engraving so you need to pick one that will. The example that I have chosen for this article has plenty of detail, no large areas of a single color, and some subtle shading that should make a good subject.
The image was processed in Lightroom, and the settings chosen can be seen in the screenshot. You should be able to replicate them in whatever image editing software you use.
There is no absolute right or wrong way to photo engrave; it all comes down to your preferences and some trial and error to get the final effect that pleases you. I resized the final image to 200mm wide at 318dpi for this engraving. 318dpi equals a dot size of 0.08mm, which is slightly smaller than the standard 1.5” lens can produce, and this works well.
How to Laser Engrave Photos on Slate Stone?
I am fortunate to own an OMTech 60W CO2 LLaser Engraver. It was well-built, sturdy, and has more than enough power to cut through 1/4” MDF, and yet is delicate enough to engrave cardstock. Slate does not need a lot of power to create a 3D laser engraved photo, and more powerful lasers might struggle to fire at low power settings, so the 60W is an excellent choice for photo engraving on stone or rock.
How to Choose the Focal Lens for your Laser Engraver?
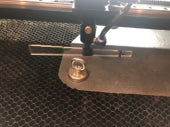
Your CO2 Laser will have a laser head that can accept focal lenses of various focal lengths. Although I have experimented with dedicated laser focus lenses, on slate I have found that the stock 1.5” focus lens gives a perfect dot size to engrave at 318 dpi ( 0.08mm). Photo engraving with higher dpi does not result in any improvement to the image due to the way the slate ablates under the laser.
How to Engrave Photos with a Laser Machine?
Whenever starting with a new material, I highly recommend performing a test engrave. You can often find pre-created test patterns for different materials on the various Facebook groups, but for slate, I create my own using the actual image I will be photo engraving.
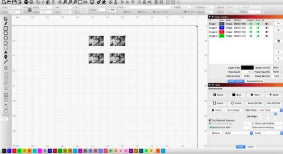
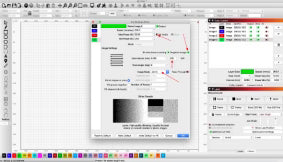
Start by resizing the image down to 20mm wide and duplicate it a few times. By assigning each copy its own color in Lightburn, we can adjust the power settings for each image and test engrave the result. Remember that we are burning dots in the dithered image and so set the min power to 0 and only adjust max power. Also, this is one of the few situations where speed has less impact on the final image compared to engraving other materials. Only changing max power for each of the small photos should work well.
Laser Power
ou may start off with a broader range of powers, but then once you know the ballpark settings, you can fine-tune - in my case, I chose 18%, 16%, 14%, and 12% power at 250mm/s. Do not be tempted to push the speed too high. Faster speeds will wear your rails out quicker and may cause a stretch in your belts as the laser fights the inertia of moving the head so quickly.
DPI
When setting up each image layer for photo engraving, we set the dpi to 318 to match the original image.
Invertieren
Remember to tell Lightburn that you want this inverted by clicking the appropriate button.
Dither
Choose one of the built-in dither patterns (for photos, I choose Jarvis which is recommended for image engraving).
We can write a whole new article about dithering for photo engraving and the differences between various algorithms, but suffice it to say that each alternative introduces randomness to the dots to improve the final image depending upon what type of image we are working with.
Air Assist
We do not engrave with powerful air assist, but that does not mean that there is no air at all, just that it’s at a very low level — just enough to keep the lens clean and prevent debris and smoke from going up into the nozzle. Too much air will blast any smoke particles or debris back onto the slate, contaminating the photo engraving.
Laser Engraver Focus
Lay the piece of test slate on the bed and check the focus of the lens. I recommend checking at each extremity of your image engraving. Use the LightBurn move icon to position the laser head and then check focus. Slate can be a little uneven, so you may find a magnet or two will prevent it from rocking or moving.
Now, confirm that your cooling water temperature is between 60–70°F (16–21°C), the air extraction fan is running, the laser PSU is on and the lid is closed and you can hit the start button in LightBurn. The laser will now photo engrave your test images at each of the layer settings, and when complete, you can examine them.
Typically you should see an improvement in the image quality as the power changes, and you will then decide what the ideal settings are. Open your original image and copy these settings across to it. You are now ready to engrave your final piece.
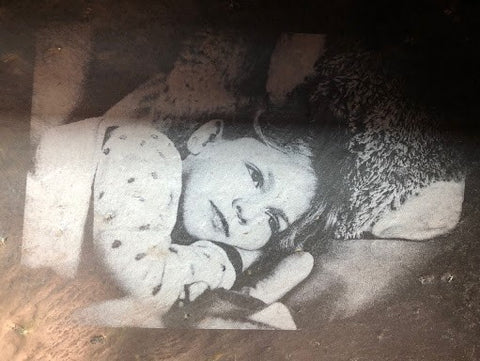
On the final image engraving, I like to draw a box around the image and then use the contour button to create another box 3mm larger. Delete the first box and then engrave the contour box at 100mms @ 25% power. If I am going to frame the piece, this allows me to cut it out later. Finally, I give the engraved piece a coat of matte acrylic varnish to seal it and bring out a bit more contrast.
Save Your Settings
One final piece of advice: now that you know the ideal settings to photo engrave this slate, save it in the Lightburn material library. Open the library from the Window menu item if it’s not available in the control panels and click “Create new from layer.” Add the material name and its description and save the library so that the next time you need to laser engrave slate, you will have the settings at hand.
Conclusion
The secret to successful CO2 laser cutter photo engraving on stone or rock is following a few simple steps. Choose a good image, prepare it beforehand and then test your material. Once you know the best settings for your laser engraver, you can repeat these techniques time and time again to create beautiful photo engraved gifts. Slate can be purchased as pre-cut pieces from kitchen stores as coasters and placemats, all of which can be laser photo engraved. The natural finish of slate enhances the photo, and if you are fortunate enough to find a source of free slate tiles, then even better!
Related Blogs
