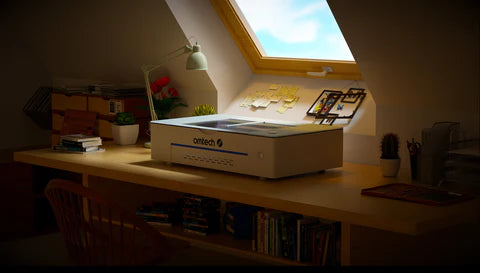
How to Keep Your OMTech Polar Laser Machine in Top Shape
Regularly using your OMTech Polar Laser Machine for creative projects is fantastic, but keeping it clean is essential for consistent performance. Whether you're a daily user or occasionally fire up the laser, maintaining it is easy and fun! Let's dive into a step-by-step guide to ensure your laser stays in tip-top condition.
Cleaning Schedule: Tailored to Your Usage
How often you clean your CO2 laser etching machine depends on how much you use it. If you're someone who uses your laser every day, it's a good idea to clean it more often. This helps to keep your laser working its best and ensures that it performs well over a long period. To ensure your cleaning efforts are effective, you'll want to gather everything you need and follow the simple step-by-step instructions. Doing this gives your machine a longer and more efficient life and ensures you won't miss a beat when creating your art masterpieces.
What You'll Need:
- Rubber gloves for protection
- Lens cleaning cloth or household cotton swabs for mirrors and lenses
- Shop towels for railings and the removal of old grease
- White lithium grease to replace removed grease on rails
- Microfiber cleaning cloths for dust and debris on walls and outside
- Isopropyl alcohol (99% is preferable, but 91% works, too) for lenses
- Cordless vacuum with a horsehair bristle brush attachment for surface dust

Daily Maintenance:
Remove the entire laser nozzle assembly by gently pulling on the airline, and disconnecting it from the plastic elbow connector. Remove the elbow by turning it counterclockwise.
- Start maintenance by gently pulling on the airline and disconnecting it from the plastic elbow connector. Remove the elbow by turning it counterclockwise.
- Remove the metal collar under the lens plate by turning it clockwise, loosening it until it falls off. Lower the z-axis by manually adjusting the screw counterclockwise. The laser nozzle will lower, providing enough clearance to pull out the laser nozzle itself. Once removed, unscrew the tip of the laser nozzle, giving access to the underside of the lens for cleaning.
- Dampen your cleaning cloth with isopropyl alcohol, and gently wipe the lens free of streaks, smudges, or debris.
- Dampen a cotton swab and clean the inside of the lens, thoroughly wiping the lens and wall. Wipe the mirror located above the laser nozzle assembly with your isopropyl-dampened cleaning cloth or cotton swab. Clean the lens on the left side by also gently wiping it with a dampened cloth or cotton swab.
- Place the lens and metal ring back into their original placement. You may need to raise the z-axis to back up to give you clearance.
- Return the plastic air connector to its proper spot; be sure not to force it. Orient the airline connecter so the airline tubing can slide back over it.
- Grab the tip of the laser nozzle and screw it back in.

Weekly and Monthly Maintenance
- Remove the right side cover by removing the front screw and the rear screw.
- Unplug the door sensor cable and push it out of the way. Unplug and pull down the cables attached to your push button. Remove the cover by pushing the inside wall with your hand and pulling up with your other. The cover should pop out. Carefully put the glass cover somewhere safe so that it doesn't break.
- Remove the left side cover by removing the front and rear screws, and disconnect the light bar plug and door sensor. Pop off the left side glass cover by pushing the inside wall with your hand and pulling up with your other.
- Vacuum the tray and honeycomb bed with your cordless vacuum and brush accessory. Remove all debris and dust. Use a degreaser if the tray has grease and grime.
Wiping down the Machine
1. Remove the dust cover for the tube and the electronic components. Use the included set of Allen wrenches to remove the two screws and the cover. Remove the screw on the left front and back, then the right front and back.
2. Thoroughly use your vacuum attachment to clean the surfaces of the laser, including the fan, walls, and unplugged electronic components. If your vacuum has a crevice attachment, use that for the hard-to-reach spaces.
3. Once thoroughly vacuumed, wipe down the surface of the glass tube, the dust shields in the back of the unit, the underside of the glass lid, and the unit's walls with a microfiber cloth towel.

Remove the Old Grease from your OMTech Polar's Rails
1. Use a shop towel to thoroughly remove old grease from the machine's left x-axis and x-axis railing, and use a cotton swab to clean all of the recess attachment parts on the linear rail.
2. Wipe down the z-axis and laser head, and clean the excess grease on the bearings behind the laser head. Remove the old grease from the linear bearings below the gantry that run along the y-axis on the left and the right side as well.
3. Sparingly regrease the railings with white lithium grease as necessary. Grease the z-axis area by dabbing a small amount of grease on the screw with a paper towel, and work the screw up and down until the entire screw has a thin coating of grease. Grease the rail and linear bearing located behind the screw, also.

Reassembly
1. Pop the left cover back in, then push the light bar connection back and reconnect it.
2. Reconnect the door sensor. Reinstall the laser tube dust cover and wipe it down one last time with a microfiber. Put the right cover back in, and reconnect the two push button cables.
3. Move the gantry out of the way to work the lightbar plug back through the hole and back into its connection. Plug the door sensor back in on the unit as well.

Takeaway
And there you have it! A thorough step-by-step on how to perform general maintenance and clean-up on your OMTech Polar Laser Engraver Machine. Explore the YouTube channel of our affiliate Cam Edmonds from Edmonds Woodshop to tap into more valuable tips and tricks. Click here for a wealth of insightful content, and keep an eye out for his affiliate code! If you have any further questions, do not hesitate to contact our team of OMTech support professionals. Remember, OMTech provides a 2-year warranty covering machine parts and hardware. This means you're protected and covered if anything happens to your new machine during that period. Proper care and maintenance will give your machine an exceptionally long life and keep your creative output on track for years to come!
Related Articles