How to Unbox your OMTech Laser
Help you to unbox your OMTech Laser safer and easier.We will guide you through identifying what's in the box and what's inside the machine, ensuring that you remain well informed on each step towards successful assembly,
*Note: This blog post is written using 100W CO2 laser as an example.
- Unboxing Steps
- What's in the Box?
- What's inside the Machine?
- Complete Unboxing Video
1. Unboxing Steps
- Remove all the screws out.
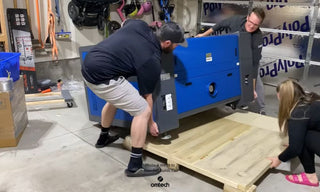
- Take the machine out of the wooden box from the bottom.
- Peel the plastic.
- Adjust the screws at the feet.
To remove the assembly, we'll need to disengage all the fasteners around its perimeter with the help of an 8mm wrench.
To safely extract the machine from its packaging, we'll need to locate the box's base and properly support the assembly as we lift. Before lifting, it's essential to check that all packaging materials, including tape and foam, have been removed, and the machine is free from any potential obstacles. Remember to lift the machine with care and maintain its stability throughout the extraction process to avoid any potential damages or hazards.
Remember to turn the wrench in a right direction to loosen and remove the screws completely. Once all screws have been taken out, the assembly will be ready for quick and easy removal


Insruction about how to unbox the machine.
2. What's in the box
1. A sheet
Show what the model is and everything that has been quality assured and tested.

Showing what the model is and everything that has been quality assured and tested.
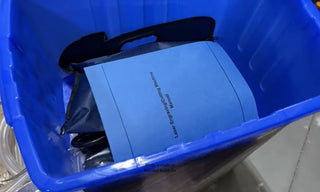
2. A blue bucket
Including a tubing that is going to connect your water lines in and out, a ducting, a water pump, a grounding wire, a hose clamp and a blue bag.The blue bag has an instruction manual, cables, tapes, a set of allen keys


Showing what are in a blue bucket.
3. A little test gauge
Test the height that you need for the correct focal length.

Showing a little test gauge.
4. The honeycomb bed

Showing the honeycomb bed.
3. What's inside the machine
1. In the front hatch
A catch tray that makes all pieces fall into it.

Showing what's in the front hatch.
2. In the right hatch
Above are the functional moving parts.Down here are a lot of electronics, including driver electronics, power supply and air pump.


Showing what are in the right hatch.
3. In the back hatch
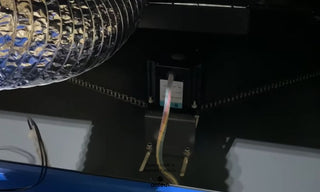
There is an exhaust fan hooked up to the bottom of the tray and a Z driver motor below.Middle is a one-hand pass-through.Above is the laser tube.On the right side of the back is the water inlet and outlet.On the left are the power cords on the machine.


Showing what are in the back hatch.
4. In the left hatch
There is a laser power supply and a little connector to see the water flow sensors.


Showing what are in the left hatch.
Complete Unboxing Video is below
Complete Video about unboxing steps and machine introduction.


