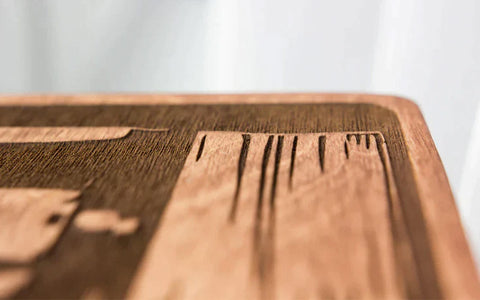
Special Christmas Gifts: DIY Wooden Christmas Cards with Laser Cutter
During the Christmas season, there are great opportunities to unleash your creative skills and create unique Christmas cards. Handmade wood Christmas cards are typically more environmentally friendly and durable than paper cards, as they can be kept for years without damage or fading. The high-quality appearance of wood Christmas cards, due to the natural texture and color of the wood, enhances their appeal. In this article, we will show you how to create unique and impressive Christmas cards out of wood using a laser cutter or laser engraving machine.
What do you Need for your Wood Christmas Cards?
Wooden boards for the cards
Laser cutter or laser engraving machine
Ideas or templates for the cards Optional: Paints, glitter, or decorations
Step-by-step Guide:
Step 1: Material Preparation
Choose the wood material for your wood Christmas cards. Light plywood or balsa wood works best for making wood Christmas cards. These types of wood are lightweight, easy to cut, and allow for precise engravings. They are sturdy, thin, and environmentally friendly. Cut it to the desired size to ensure that it fits in the laser cutter.

Step 2: Creating Christmas Card Patterns
Consider the design or motif you want on your Christmas cards. Popular ideas include Christmas trees, snowflakes, stars, or festive messages. You can create your own designs and create digital designs suitable for the laser cutter. Software like Adobe Illustrator or CorelDRAW can assist you in creating these designs. You can also use existing patterns. Polar Laser Cutter from OMTech can scan hand-drawn designs. If you don't have your own ideas, you can find many pre-made design files online. Make sure the size of the patterns fits your cards.
Step 3: Laser Engraving or Cutting
Load your design pattern into the laser cutter and ensure that the settings are correct for the material you've chosen. Follow the instructions on the laser cutter to engrave or cut the design into the cards. Precise laser cutting will give your cards a professional look.

Step 4: Creative Design
After engraving or cutting the pattern, you can add creative details to your card. Use colors, glitter, or embellishments to create a festive atmosphere. There are no limits to your creativity.
Step 5: Adding Personal Messages
Open the cards and write personalized Christmas greetings, text, or quotes. Handwritten messages add a warm, personal touch to the cards.
Stept 6: Sending and Bringing Joy
Place the Christmas cards in envelopes, send them to family and friends, and bring joy to the holidays. Unique laser-engraved Christmas cards will leave a lasting impression and convey your Christmas wishes.

Conclusion
The use of a laser cutter or laser engraving machine enables the creation of precise and detailed wood Christmas cards. This DIY project is not only creative but also a great way to express your appreciation to your loved ones during this festive season. We wish you a lot of fun crafting and a merry Christmas!
Related Articles


